Showing posts with label How To Do. Show all posts

Thursday, December 15, 2016

How To Record Any Phone Call On Android Phones

You want to record phone call on Android, but this feature is not available by default. This has pushed several developers to create apps that claim to record Android phone call, and for most users, it’s been a terrible experience even with the so-called premium apps that ought to bring a flawless experience.
Some apps are poorly codded, in fact there are a couple of apps that drain your smartphone battery. So one has to be careful when downloading some of these so-good-to-be-true apps.


Unlike the screen grabbing/capture feature which was once possible with bloated apps, almost every Android phone now has the feature by default. It is not clear if the record Android phone call feature will ever be a reality for everyone without hassle.
In this guide, I am going to walk you through the process or recording Android calls on smartphones and tablets with the Boldbeast call recorder app.
NOTE: In some countries, recording of phone calls is illegal. Ensure it is legitimate in your country before attempting to use it.
Goodnews! The Boldbeast Android call recorder app will work on almost all Android smartphone as it doesn’t require root access. However, if you use phones like Nexus or Moto G, E, X with Marshmallow installed, you will need root access.


Record Android Phone Call – Steps

Install Boldbeast call recorder from Google Play.
For smartphones that require root access:
  • Open the app > Menu > Settings
  • Navigate to “Call Settings”
  • Tap “Fix Recording Issues”
  • Tap “Enable Rooted Options”
  • Tap “Enable” grant SuperUser access
  • Go back to main menu; make changes in “Record Mode”“Record Format” and “Fix Recording Issues”
For the settings, visit developers list (several smartphones listed)

Recording Phone Calls

  • Make a phone call
  • Tap on “Record” button (found at the upper-left of your device)
  • Tap on the “Record” button one more time to end recording or simply hang up.
  • Tap the phone icon on the app to listen to your recorded Android phone call.

How To Uninstall Preinstalled Apps From Android Mobiles

One of the most irritating things is to uninstall preinstalled apps from Android phones. You purchase a smartphone only to find out that your phone maker has preinstalled a lot of apps that you don’t need.


These apps are called bloatwares, and I want to show you how to uninstall bloatwares from Android phones. This will be an all-in-one guide that will aid you to delete preinstalled apps from Android.
There are system app remover apk that I will talk about. Also, for non-rooted Android smartphone, there is going to be a way out of it.
Before I start off, here is an article that will show you a simple approach to get Android Apps for free.
Despite bloatwares causing performance issues, discover the new way I save up more battery power on my smartphone.
Alright, let us start off with understanding some basic things before attempting to uninstall preinstalled (bloatware) apps from Android phones.

Uninstall Preinstalled Android Apps: Why Not Leave It?


This is easy, imagine purchasing a smartphone with 16GB on-board storage and you are left with 8-9GB of free space? That is exactly what happens when phone makers preinstall a lot of useless apps on your smartphone.
They behave like it’s their smartphone and not yours. They force you to use their blotwares which you never use eventually. You need more space, it’s your smartphone so you have to uninstall blotwares on Android phones because at the end, it will also enhance performance.
So, you see why you need to delete built in apps on Android? These system apps are definitely a pain in the backside.

Uninstall Preinstalled (Bloatwares) Apps From Android Phones: The Big Challenge

The big challenge to remove system apk on Android is that your smartphone has to be rooted.
No! Don’t stop reading if you have a non-rooted smartphone and you don’t want it rooted.
We will overcome that challenge and here is what we are going to do.

Uninstall Preinstalled Apps From Android Phones: Options For Non-Rooted Phones

You may have noticed already that it is impossible to uinstall preinstalled apps from your Android phone. The approach you can take since you don’t want to root your smartphone is to disable them.
If your smartphone runs Android 4.4 KitKat, simply go to Settings > Device > Apps. Next step is to find the app that you want to uninstall. Select Force stop and then Disable.
You can’t delete the app, that means it will still eat up your storage space but you can disable the app, and it will never run on smartphone again, it won’t also appear on your app drawer unless you do a factory reset.
For Android 6.0 and latter, the process is almost the same. Just go to Settings > System > Apps >. find the app that you want to delete. Select Force stop and then Disable.
The last piece of advise I am going to give to you, my friends with non-rooted smartphones is that disabling or hiding useless apps on your Android phone is exactly the same as deleting the app. The only disappointment is that you can remove the system app files from your device.
Like I said earlier, it will still eat up of your space but it will no longer affect performance by running in the background and you will eventually forget about it after some time because it will no loner appear on your app drawer.

Uninstall Preinstalled Apps From Android Phones: For Rooted Phones Users, Delete That Cr*p Now!

Yes, that is how I feel right now. Delete that useless app right now. *smiles*
Alright, here is what you need to do to remove system apps from Android phones.
You are going to download any of the system app remover apk in the list below. Depending on your preference, you should get what works best for you.

1. Titanium Backup


This is a system app remover apk that comes with a lot of features. Titanium Backup will remove any unwanted preinstalled apps on your smartphone.
It comes with a Pro version with a price tag of $6, but the free version will let you do the job without spending a dime.

2. App Master

This app basically removes any kind of app in bulk. It is designed for batch or bulk uninstalling of apps including the so-called preinstalled apps.


Get App Master
https://play.google.com/store/apps/details?id=com.droidware.uninstallmaster
This app has been removed from Google Play.

3. System App Remover

This robust built in app remover tool also comes with an option that will allow you move apps to SD card.


If you need that feature, you might consider downloading the system app remover but don’t forget that moving app to SD card may cause performance issues when using the app.

4. Root Uninstaller

This apps uninstalls default Android apps from your device. It can also freeze or disable preinstalled apps.


A fairly little Android system apk that does so much.
It looks like we have a lot already, but I will leave you with a bonus.

Uninstall Preinstalled Apps From Android Phones: Bonus System Remover Apk

1. Uninstall Master

Here is what the app description says on Google Play,
“You have to be bothered by the application is pre-installed in your devices. You feel lost time when to remove the application. This application will be a quick solution and convenient for you!
Key features: (Devices Requiring ROOT for full functionality)”
Thankfully, it does just that.
That’s it folks. This is how you uninstall preinstalled apps from Android phones. I hope this was helpful, let us know what worked for you.

Sunday, June 12, 2016

How to Bypass Phone SMS Verification on any Website/Service

Sometimes putting up your phone number to a website while creating any account could be a troublesome task as your private number can be leaked through many sources. Therefore, we are here with a trick to Bypass SMS Verification Online on Websites. With the help of listed 8 websites, you can easily bypass SMS verification process.


Today while creating accounts on numerous websites you need to confirm your phone number through verification SMS, but sometimes you might notice that the website is not much secure to bestow your personal mobile number with them. As your private number can be leaked through some untrusted websites by their data exposure. So alternative method to avoid all this is bypassing this verification. In this method, you don’t need to enter your personal number for verifying, as you will have to use an artificial verification number. So this method is very tricky and absolutely works, which you will get to know after reading the below method.

How to Bypass SMS Verification Online on Websites for Free

Firstly let me clear one thing, you should not go for this bypass SMS verification if you want to verify for some trusted networks like Gmail, Yahoo, Facebookand all other. And this method is very modern to bypass SMS verification at some promotional networks where there is a risk of your number being leaked. So just follow up the below steps to proceed.
You Just need to visit any of the site listed below, as these websites are perfectly bypassed the SMS verification.

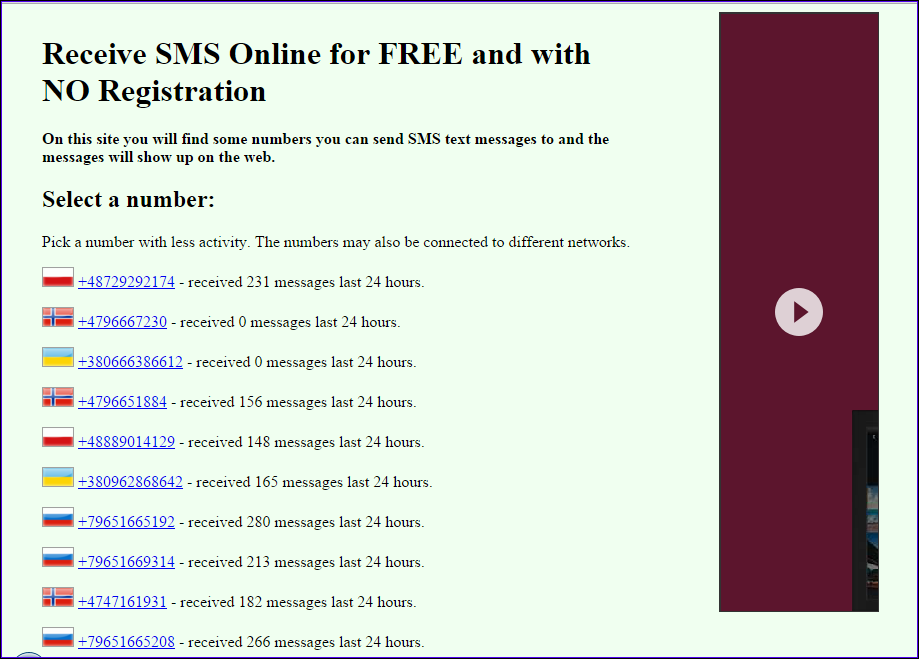
1. www.Receive-SMS-Online.com


Receive-SMS-Online
Receive-SMS-Online

In this website, you will find out the 7 dummy numbers that you can use to verify through SMS verification. There you need to select any number and then open that number that you have used to verify any website. and you can search out your corresponding verification code in Inbox

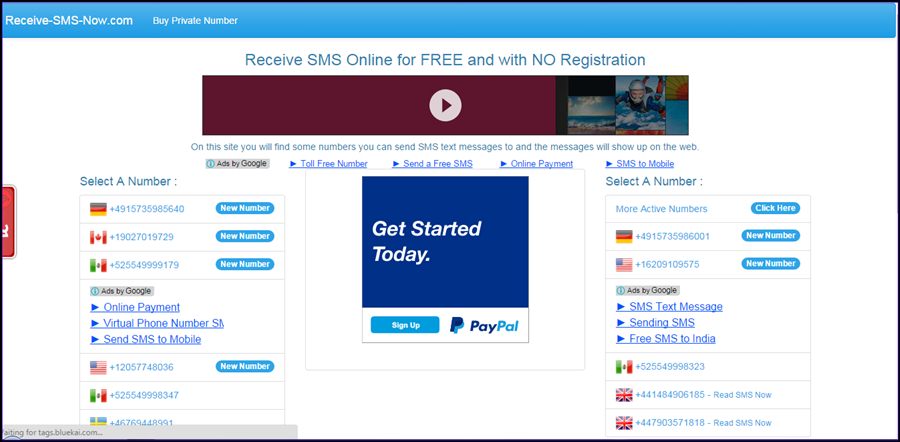
2. www.receive-sms-now.com


receive-sms-now
receive-sms-now

This is another website which offers 22 dummy numbers for verifying process, you can choose any of them and can tap on it to find your particular verification SMS on it.

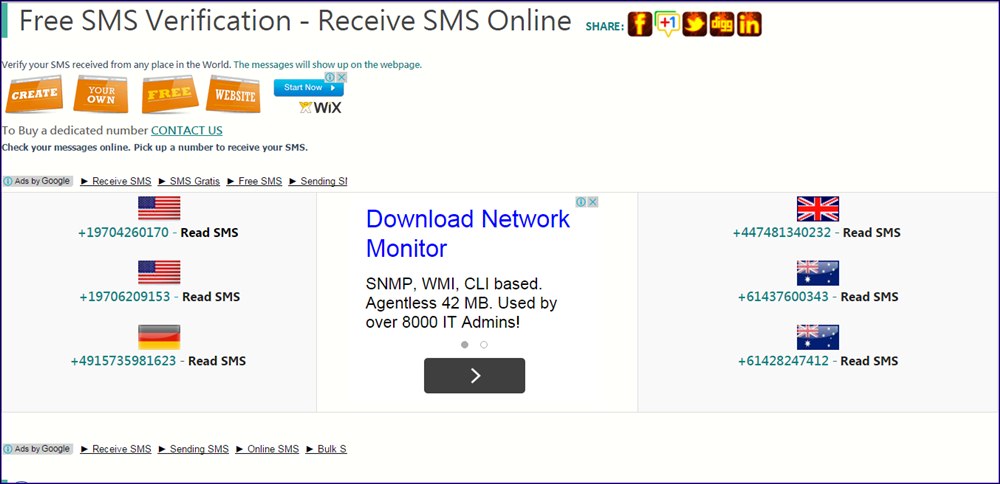
3. www.freesmsverification.com


freesmsverification
freesmsverification

Here you will find the six different dummy mobile numbers that you can use to bypass your SMS verification as the verification code will be there inside the inbox that you have selected on this website.

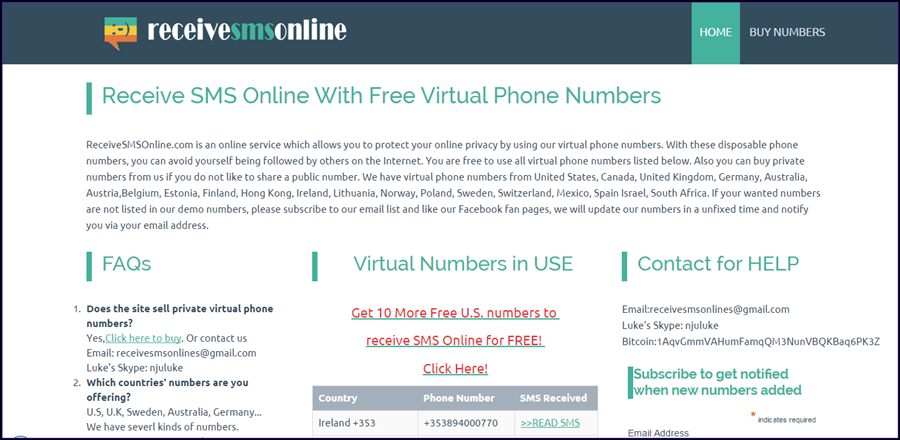
4. www.receivesmsonline.com/


receivesmsonline
receivesmsonline

Here you will find 10 different number from the US to receive SMS online for absolutely free. You can undoubtedly use this site to verify your account. It also gives a number of Poland, Norway and Canada too. So you can make full use of this website.

5. www.hs3x.com


hs3x
hs3x

In this, website you will find out more than 10 dummy numbers that you can verify through SMS verification. You just need to click the number page and refresh in order to view arrived messages. Numbers are updated monthly.

6. Onverify.com


onverify
onverify

Onverify.com helps your online business to automatically call your customer, validate a transaction or action. Through HTTP API or SOAP API s. You can use its Phone/SMS delivery option to receive text messages.

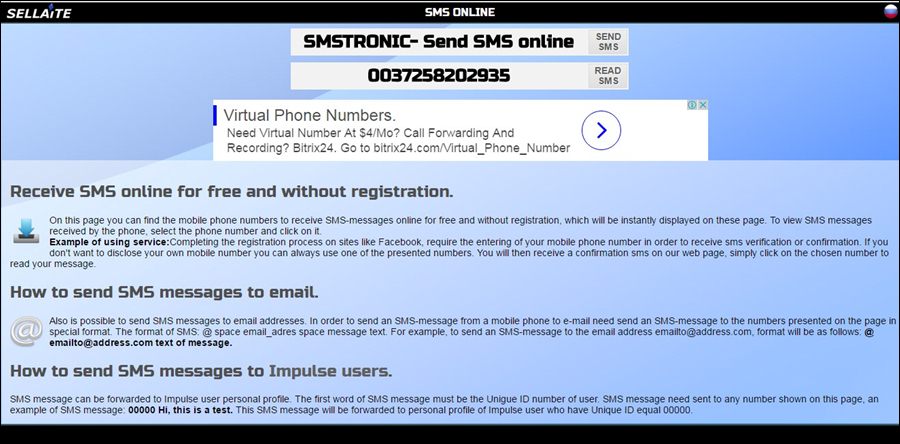
7. Sellaite.com


sellaite
sellaite

On the page, you can find the mobile phone numbers to receive SMS-messages online for free and without registration, which will be instantly displayed on this page. To view SMS messages received by phone, select the phone number and click on it.

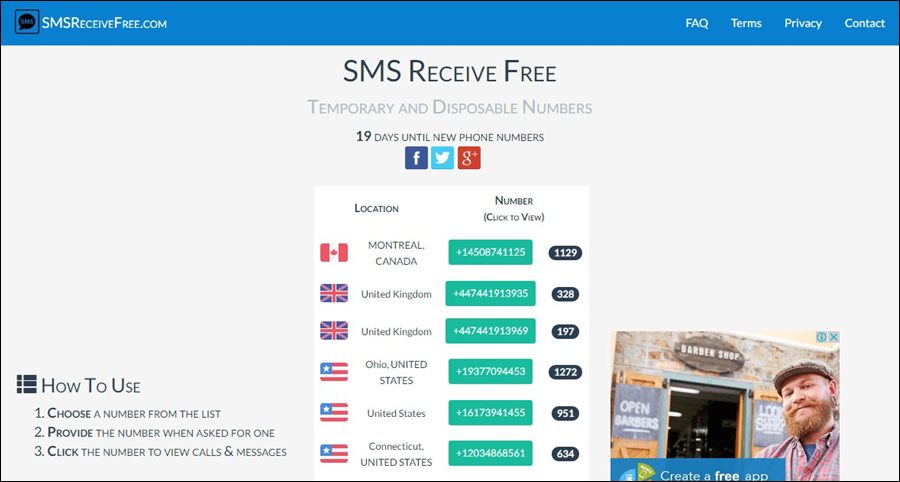
8. Sms Receive Free


SMS Receive free
SMS Receive free

This provides a virtual phone number that allows you to verify and register for various websites, absolutely free. The phone numbers are disposable and all messages are discarded after 24 hours. Provided virtual phone numbers are refreshed with new ones every month.
Now wheresoever you require to verify your phone number just visit any of above eight websites, select any of the numbers, fill it in the place of your number in the verifying network, come back to the site and check out your verification code and fill it there and you are done.
So this is all about How to Bypass SMS Verification Online on Websites for Free. With the help of above-mentioned sites, you can efficiently verify any number and can access the services of any network that need phone number verification first. Also, will be extremely secure as you don’t have used your personal number. Hope you like this trick to Bypass SMS Verification, don’t forget to share it with other and leave a comment below if you have any related queries.

Monday, June 6, 2016

How to Trace Call, Location Of Every Single Mobile Phone

This tool uses SS7 Flaw to let you spy on mobile phone calls, messages and user location

The latest news only confirms the theory that Israeli firms are creating a position in the spying and surveillance industry with their ground-breaking and wide-ranging products. The latest news only confirms the theory that Israel is going places as far as digital surveillance is concerned.
Established in 1993, an Israeli firm Ability has developed really amazing software, which has been named Ability Unlimited Interception System to provide unlimited surveillance chances to law enforcement in the US so that criminal activity could be kept at bay, it has been reported. Currently, this system can recognize calls, texts and location of almost any mobile phone around the world and is available for US$20 million. It is also being guessed that it is quite an accomplishment by the Israeli firm to get it for this price and the amazing skills of the system.
Launched in November 2015, the system’s asking price is the maximum rate while it may cost less if the number of targets and customers that are needed to be snooped upon is less.
Forbes reports that: “All a ULIN customer requires is the target’s phone number or the IMSI (International Mobile Subscriber Identity), the unique identifier for an individual mobile device. Got those? Then boom – you can spy on a target’s location, calls and texts.”
This new system outdoes all other currently available espionage technologies, as the people behind Ability’s formation are specialists in the off-air interception of satellite and cellular communications.
Also, this new system is very effective as it can seize all types of mobile phone traffic including GSM, LTE and MTS without needing the approval of the mobile service provider or being in close proximity of the device.
However, how does this system carry out such extraordinary accomplishments?
It actually abuses an error present in the Signalling System No. 7 or SS7, which is the international telecom standard that demonstrates how information is swapped across digital networks from public switched telephone networks (PSTN) for cell phones. The “Signalling Points” of SS7 and the nodes that use out-of-band signalling to help services like call forwarding.
A yet unknown third party is accountable for licensing this vulnerability for Ability and providing access or information about the SS7 fault. Therefore, by simply tapping into the targeted phone, it is easily possible to intercept any mobile phone for law enforcement.
However, this latest installment in inspiring fool-proof spying campaigns for carrying out criminal investigations has again kindled dispute on the breach of user privacy through the use of such software.

How To Hack WhatsApp Using SS7 Flaw

Researchers are easily able to hack WhatsApp and Telegram using the known telecom flaw

We continuously receive queries from readers about how to hack WhatsApp. The world’s most popular cross platform messaging App is seen to be ultimatehack by many because it has recently enabled 256-bit encryption.
For ordinary souls this encryption would take days and months to decode a sentence or a complete message. Ditto with another secure messaging service called Telegram. Though Telegram is not as popular as WhatsApp, it has its ardent group of followers who use it for its encryption as well as snooping free service.
Though both of these Apps are end-to-end encrypted both of them suffer from hardware side vulnerability which can be exploited to hack and hijack both WhatsApp and Telegram.
The vulnerability lies in Signalling System 7, or SS7, the technology used by telecom operators, on which the highly secure messaging system and telephone calls rely. SS7 is a set of telephony signalling protocols developed in 1975, which is used to set up and tear down most of the world’s public switched telephone network (PSTN) telephone calls. It also performs number translation, local number portability, prepaid billing, Short Message Service (SMS), and other mass market services.
SS7 is vulnerable to hacking and this has been known since 2008. In 2014, the media reported a protocol vulnerability of SS7 by which both government agencies and non-state actors can track the movements of cell phone users from virtually anywhere in the world with a success rate of approximately 70%. In addition, eavesdropping is possible by using the protocol to forward calls and also facilitate decryption by requesting that each caller’s carrier release a temporary encryption key to unlock the communication after it has been recorded. Researchers created a tool (SnoopSnitch) which can warn when certain SS7 attacks occur against a phone and detect IMSI-catchers.
You can view how researchers managed to hack WhatsApp and Telegram using the SS7 flaw below :

WhatsApp Hack

Telegram Hack

Both the hacks exploit the SS7 vulnerability by tricking the telecom network into believing the attacker’s phone has the same number as the victim’s phone. Once the network has been fooled, anybody, even a newbie can spy on the legitimate WhatsApp and Telegram user by creating a new WhatsApp or Telegram account using the secret code.
Once complete, the attacker now controls the account, including the ability to send and receive messages. Even more horrific is the fact that the hacker can also send messages on behalf of the victim, and read confidential messages intended for the victim without ever having to try to break strong encryption protocols.

Sunday, May 29, 2016

How to Fix 100% Disk Usage Issue on Windows 10

Ever since I started using Windows 10, every time I opened the Task Manager in detailed view, the disk usage activity always touched the mark of 100%. If not a century, it was always above 90% which was quite odd. For the first few days, I thought that it might be because of the heavy video rendering that I did on my PC for our YouTube channel related work. But after a few weeks I realized that even while my system was idle with no major background processes running, it was hitting the 100% mark just for disk usage. The CPU state was mostly idle, going from just 2 to 10%.
It was enough to convince me that it’s not the workload that’s causing my PC to be slow all the time with obnoxious disk usage. It was time to find a solution and after hours of online research, I managed to find out some working tricks. These tips solved the issue on my PC and now my computer shows decent disk usage with a significant improvement in performance.
So if you too are facing similar issues on your Windows 10 computer, here are the 4 things that you should check on your PC.
Note: If you are not sure what your disk usage in Windows 10 is, right-click on the taskbar to open up Task Manager and here enable the detailed view. In the Processestab, you can see the CPU, Memory, and Disk Usage on your computer.

Disable Windows Search

The first thing you must check out is the Windows Search services which are kind of buggy and cause Windows 10 on your computer to enter a search loop. Once Windows 10 enters the search loop, it starts indexing files over and again which cause the high disk usage with minimal CPU and Memory usage. I am not sure when Microsoft is going to take care of this bug, but the only option you can go with is to disable the Windows Search Properties permanently. To get started, open up Windows’ Run box and execute the command services.msc.
services.msc
Once the Services window opens up, look for Windows Search and double click on it to open up the properties page. Here, the first thing you should do is click on Stop to immediately stop the service and then change the Startup Type to Disabled. That’s all, save the settings and after some time, you should notice an improvement in the disk usage activity. But if you still have the issue, don’t worry, there are still a few things you can try.
windows search

Disable Superfetch Services

The next thing you can try is to disable Superfetch services from services.msc window itself. Superfetch service caches data to RAM so that it can be immediately available to your application. Unfortunately, the service is not  always right about which software you’re going to use and can keep your hard drive busy for minutes after booting and closing applications.
superfetch
While disabling the Superfetch service, make sure you stop it first and then change theStartup Type to Disabled.

Disable Windows 10 Tips

Disabling the above two services did the trick for me, but if you still are not seeing any improvement, you can try a tip I read on Reddit. A few users suggested to open Windows 10 settings and then navigate to Notifications & actions. Here turn off Show me Tips about Windows and that’s all. It should just take a minute or two before you see the results.
windows tip
I haven’t tried this myself, but from the comments on the Reddit page, it looks like that the trick is working for users and is definitely worth a shot.

Conclusion

Those were the few tips you can try to get the Windows Disk usage to behave. If none of them works for you, I am afraid it might be because of some malware on your computer and you might have to disinfect the Windows 10 or clean install from the scratch in a hope that the issue is fixed.

How to Access Shared Windows Folders On Android Over WiFi

While talking about the AirDroid for Android the other day, we discussed how you can use the application to manage your phone’s data and files from your PC using a WiFi connection. But what if you want it the other way? What if you wanted to access a folder on your Windows PC on your phone and edit the files present in it?
Of course using an online backup tool is an option but you might not want to put a folder there just because of the purpose of sharing on your phone. You should be able to access it directly through WiFi, right?
You all probably know about file sharing in Windows and how it can be used to work on files hosted on different computers using a network connection (LAN or WiFi). Today we will see to use the same principle of file sharing and access files shared on your Windows PC on your Android.
Let me first show you how you can share a particular folder on Windows. And then we will move to the Android part of the process.

Sharing folders on Windows 7

Step 1: Right-click on the folder you want to share on your Windows and click onProperties to open the folder properties. Navigate to the Sharing tab and click on theShare button to open the File Sharing window.
sharing
Step 2: On the File Sharing window, you will be asked to enter the name of the group you want to share the folder with. Write Everyone and click on the Add button. You may give Read or Read/Write permission to the share access depending on your needs. Once you are done, click on the Share button.
file sharing
Step 3: Now you can opt for two types of sharing, either password protected or open. If you are on a secure home network, I would recommend you go for the open file sharing as it makes things a bit easier. But if you are on an unsecured WiFi network, you must go for the password protected sharing.
To change these settings, navigate to Control Panel —> Network and Sharing Center. Here click on the link Change advanced settings  on the left hand sidebar to open Advance sharing settings. Scroll down to the end of the page to find the Password protected sharing option, choose a password and save the settings.
change advance settings
password protection
Cool Tip: To see list of all the folders you have shared on your computer, right click on the Computer icon in the start menu and click on Manage. Having done that, click on the Shared Folders—>Shares to list all the folders shared on your computer.
computer management
You may share any number of folders you want to access on your Android.
So that was all we needed on the Windows side of the equation. Now let us configure settings on the Android.

Accessing Shared Folders on Android

Step 1: Download and install ES File Explorer on your Android device. It’s an amazing and one of the most acclaimed file managers for Android. It works on all the devices running on Android version 1.6 and above. One of the features of ES File Explorer is that it allows you to access your Home PC on WiFI via Server Message Block (SMB).
Step 2: Once you have downloaded the app, launch it. The home screen will display all the files and folders that are on your SD card. Swipe your finger to the left on the screen to move to navigate to the right to the LAN share screen. Also make sure both your computer and your Android phones are connected to the same network.
ES File Explorer for Android 1
Step 3: Touch the button New  on the top bar to add a new server (your computer in this case).
ES File Explorer (2)ES File Explorer (1)
Step 4: Here leave the Domain field empty and do one of the following tasks depending upon your sharing security.
a) If you have opted for non-password protected sharing, enter the IP address of your computer (use the command ipconfig on the command prompt of your computer to know your IP) and check the anonymous option. Give your server an alias to identify if (it’s useful when you are using the app to access shared folders on different computer) and press the OK button to add the server.
ES File Explorer for Androides file explorer
b) For those who have enabled the password protected sharing option, do not check the anonymous option, instead provide the username and password you use to login to Windows and add the server.
2012-04-20_14-37-22ES File Explorer for Android
ES File Explorer for Android
That’s all, you can now browse through all the files and folders that are shared on the computer on your Android. That’s not all, depending upon the type of sharing privileges you have granted on Windows, you can do tasks such as:
  • Viewing images and streaming live video. Though in the past, we have covered a dedicated app for this, I prefer ES File Explorer now because it’s ad-free and smooth.
  • Open and edit text files, documents and save the changes directly without downloading the files on your phone.
  • Copy a file from your computer to your phone easily. You can also modify and delete the files on your computer from your Android.
  • You can view almost all the files on your Android provided you have a supported viewer for the specific file type.
  • If you have write access to the shared folder on Windows, you can copy files and folders from Android to computer as well.

Video

Here’s our video on this entire process. Watch it to learn exactly how it is done.

My Verdict

This feature of ES File Explorer has made me fall in love with it. Now I can work on my computer while roaming in the house or while having a cup of coffee on the balcony… I just need the phone. So do try it out and mobilize your work.